05 - export
Running the Export Module
Let’s move to the final step of the pipeline: the Export module. This module allows you to create groups of samples, then generate alignments and files formatted for submission to GenBank.
Use the dropdown menu in the top left to navigate to the Export module.
Now let’s create a group of samples. Sort the samples table by clicking on the Taxon column, then select the first five samples and click the GROUP button.
A new window will appear showing some summary information for the selected samples. Type a name for the group, click Add.., then click Create. You can then click Close to return to the sample table.

The sample table now shows the group assignment in the Group column.
You can assign new samples to an existing group. Simply select the samples you wish to add, click GROUP, then choose the existing group from the dropdown menu.
Each sample can only belong to one group at a time. MitoPilot will produce a warning message if you attempt to re-assign a sample to a new group.
Currently, MitoPilot does not allow you to re-export an group name. You will have to create a new group if you wish to export certain samples again.
We can proceed to exporting the data for this group. Click EXPORT DATA, which will open a new window. Only samples that have been added to a group can be exported in this manner.
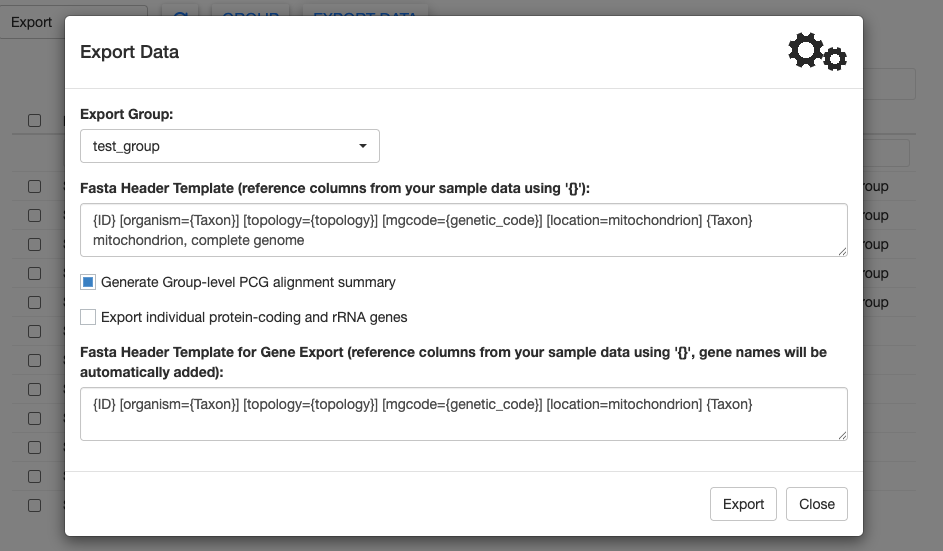
If you have multiple groups, you can select the appropriate one from the dropdown menu.
MitoPilot allows you to create a custom FASTA header for your samples, pulling data from columns in the CSV file you supplied with the mapping_fn argument of the MitoPilot::new_project function. This conveniently allows you to include metadata required for submission to NCBI GenBank. To reference a column, use curly brackets. For example organism={Taxon} will autofill values in the “Taxon” column into the FASTA header.
For this test project, we can leave the Fasta Header Template at the default value.
The Generate Group-level PCG alignment summary will run alignments of all the protein-coding genes in your group. For large groups, this can take a while. But it’s useful for a final quality control check.
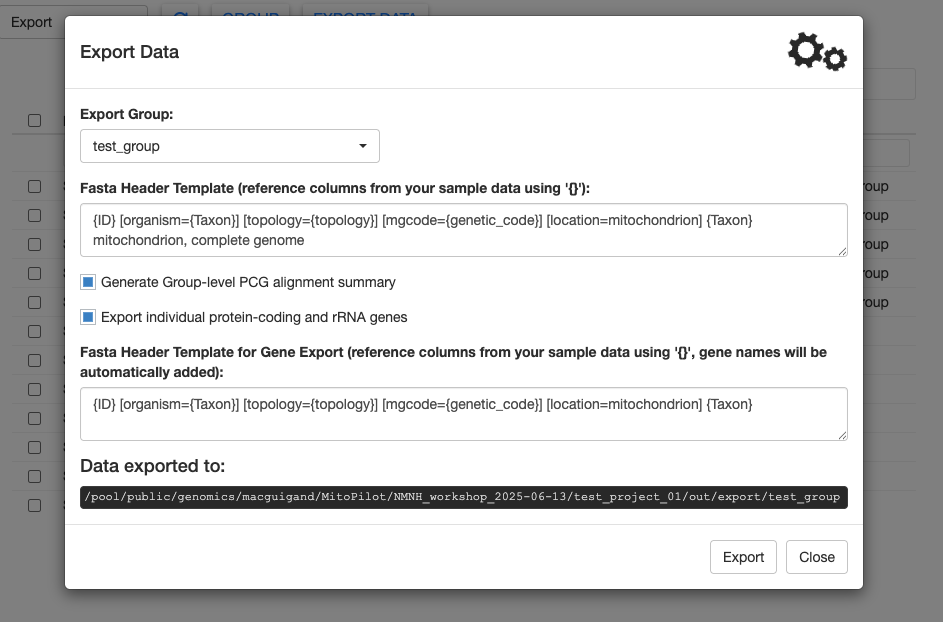
Let’s toggle the Export individual genes button. This will generate additional FASTA files and GenBank feature tables for each protein-coding gene. This can be helpful if you want to use individual genes for phylogenetic analyses or submit them to GenBank. These gene FASTA files have their own custom header template that you can modify.
Click Export to generate the final files. It may take a couple of minutes, but as long as the gears are spinning, MitoPilot is still running.
Once complete, MitoPilot will print the location of the exported files. By default, that location is YOUR_PROJECT_DIRECTORY/out/export/YOUR_GROUP_NAME.
You can download these files from Hydra or open them from the RStudio server session.
Exploring the Final Results
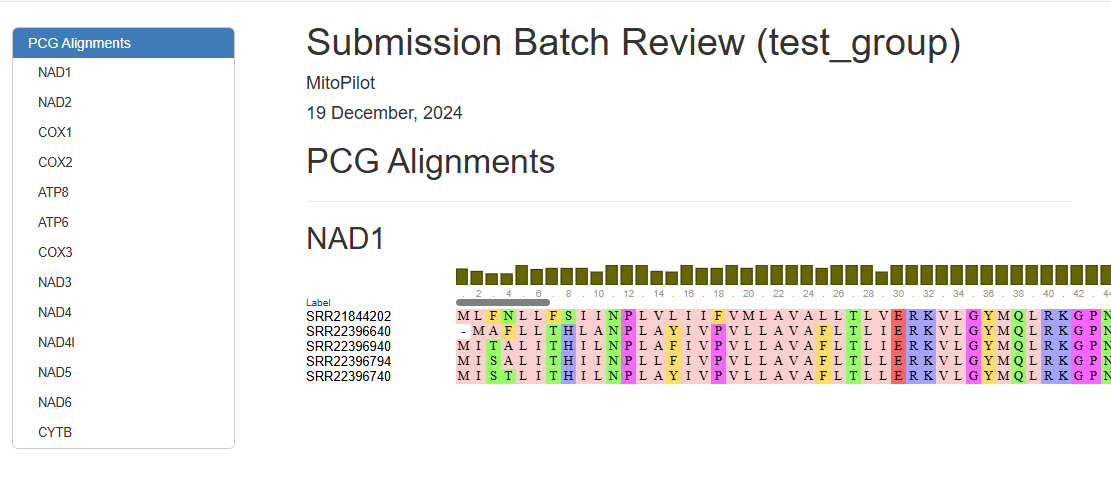
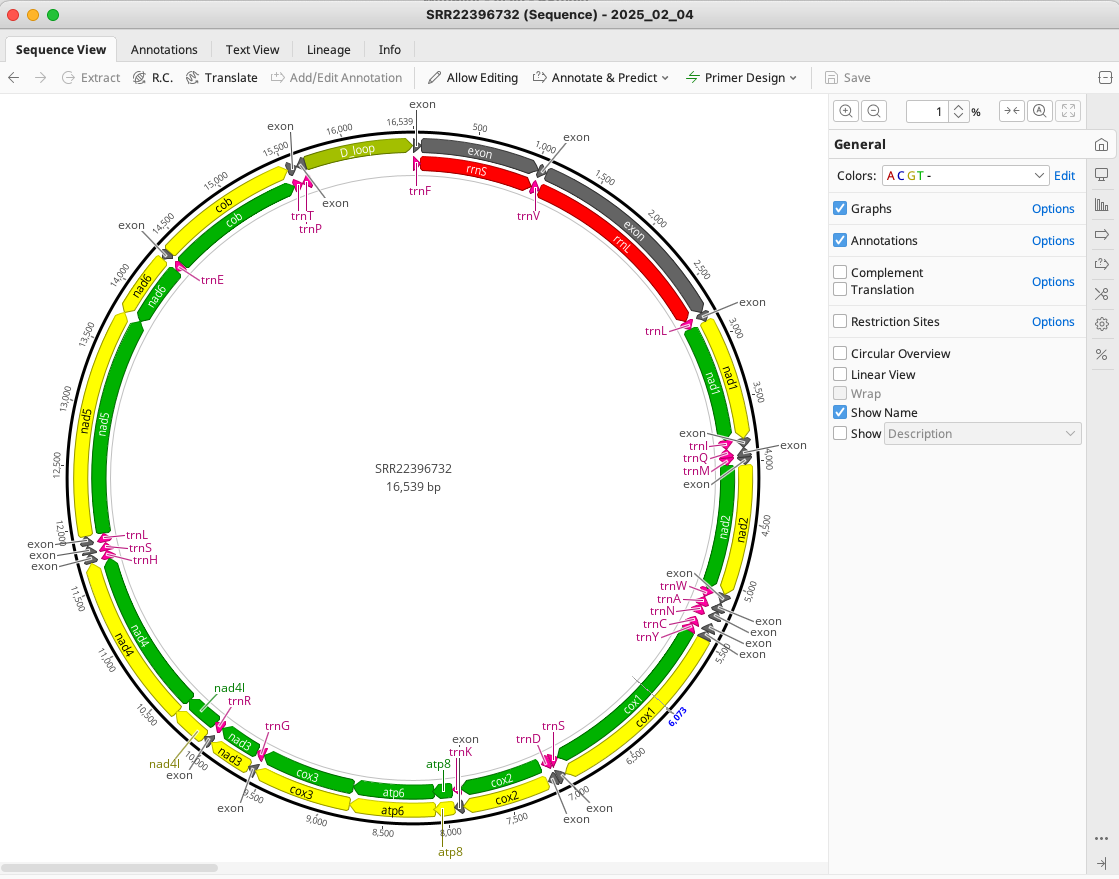
MitoPilot will produce three output files. First, the .html file contains visualizations of each protein-coding gene alignment in your export group. This may be useful to quickly identify samples with poor annotations that need additional manual curation.
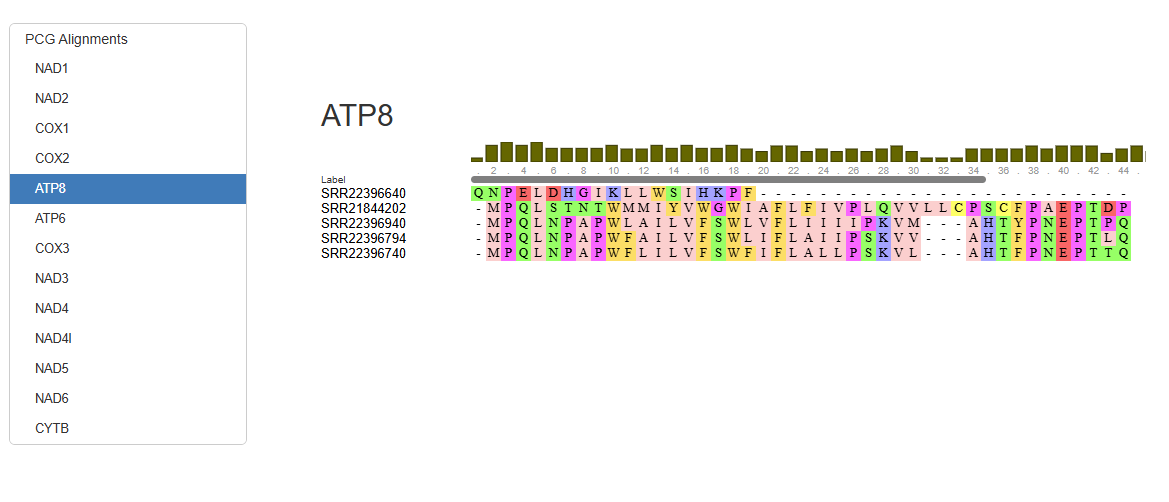
For example, the ATP8 annotation for “SRR22396640” clearly stands out when compared with the other samples in this export group.
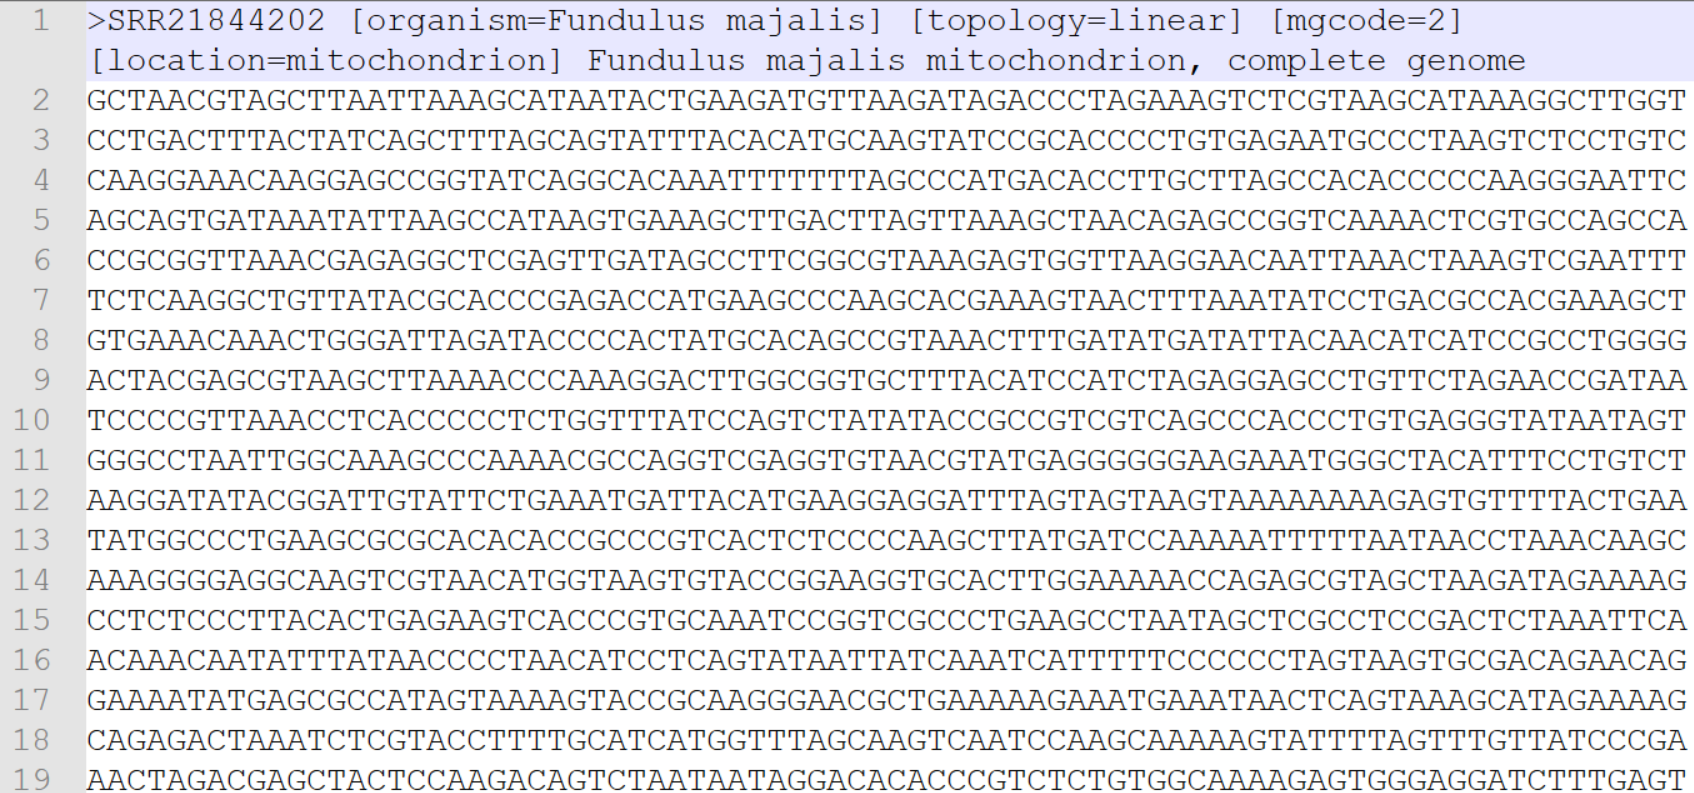
Next are the two files you will need for submission to NCBI GenBank. The .fasta file contains the mitogenome assemblies for each sample, following the header template you specified when exporting the data.
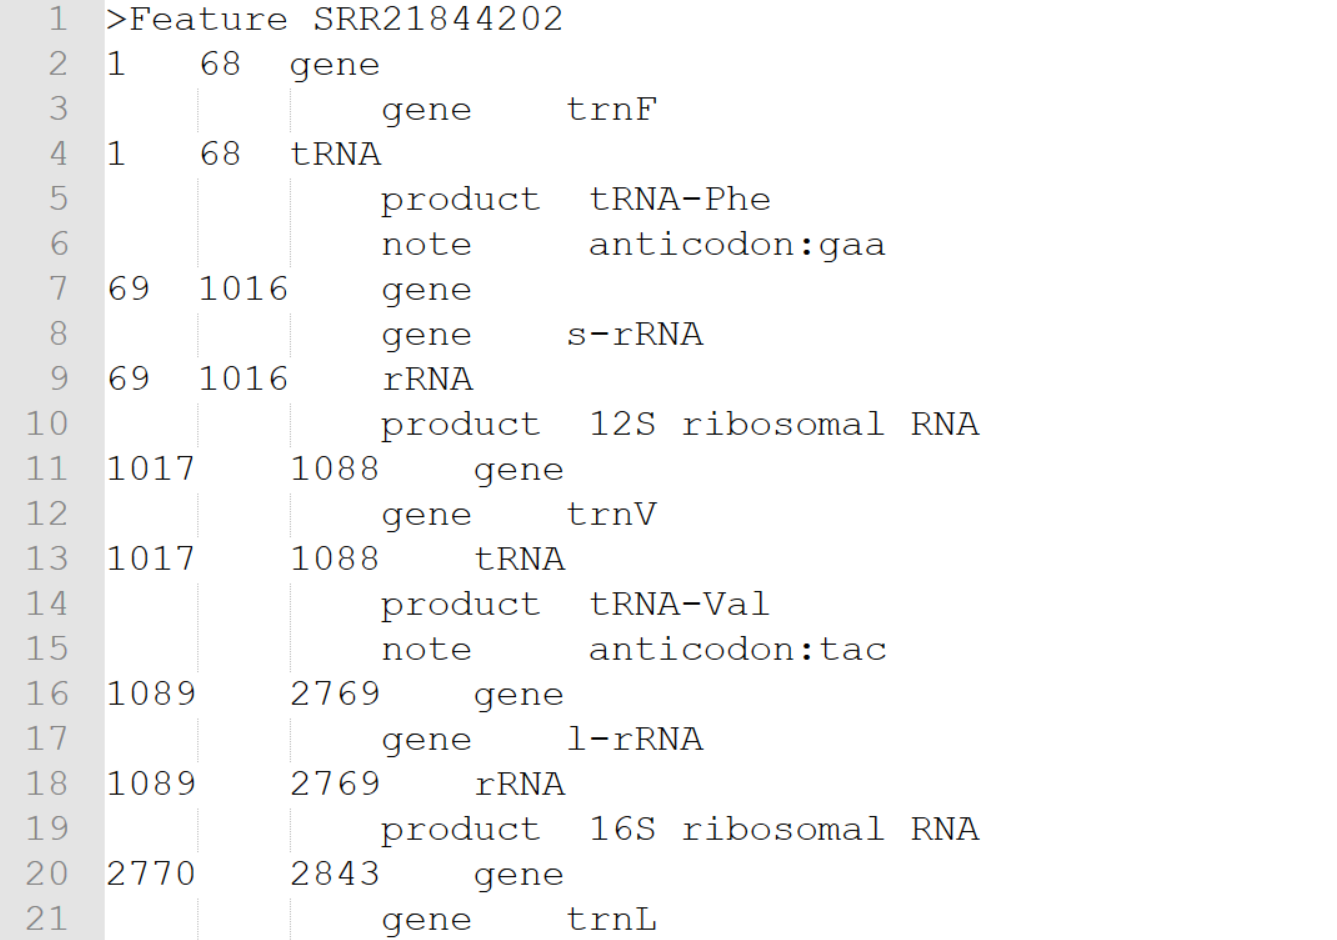
Additionally there is the .tbl file, a standardized 5-column, tab-delimited feature table containing information about the annotated genes for each mitogenome.
With a real dataset, you could use these two files for submission to NCBI GenBank.
The export directory also contains a sub-directory GFFs with annotations for each sample in GFF3 format. GFF files can be loaded by tools like Geneious for additional manual inspection prior to submission.

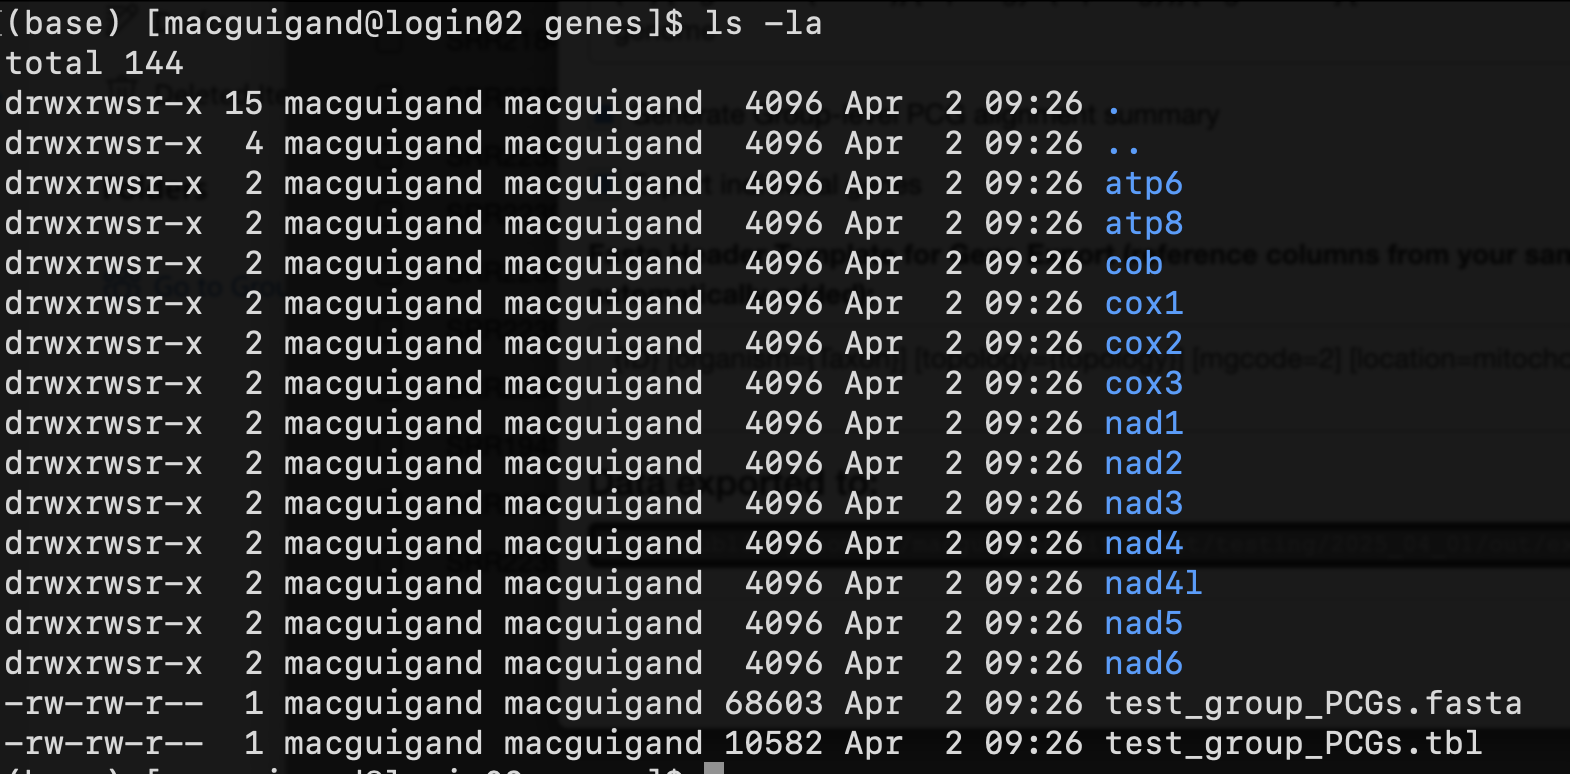
Lastly, if you selected the Export individual genes option, there will be another directory genes containing sub-directories for every protein-coding and rRNA gene. In these you will find FASTA files and feature tables for the corresponding gene. There will also be a concatenated FASTA file and feature table containing all protein-coding genes, named GROUP_PCGs.fasta/tbl.
Wrap-up
Congratulations, you’ve reached the end of the test project tutorial! Hopefully you now have a solid understanding of the MitoPilot interface and can begin to analyze and explore your own mitogenome datasets.