01 - initialize project
Test project setup
MitoPilot comes pre-packaged with a test project consisting of Illumina data for 13 fish species.
To get started, we need to initialize the test project with the R function MitoPilot::new_test_project. This function will download the data and set up a new project directory.
To initialize a MitoPilot with your own data, use the R function MitoPilot::new_project instead. You will need to provide additional information such as a mapping file and sequence data.
###########################################################################
# Initialize test project
###########################################################################

# load the package
library(MitoPilot)

# specify the directory where your test project will be created
# if the directory does not exist, MitoPilot will create it
# swap <<USER>> for your user ID
wd <- "/pool/public/genomics/<<USER>>/MitoPilot_workshop/test_project/run_01"

# specify an execution environment, "local", "NMNH_Hydra", or "NOAA_SEDNA"
ex <- "NMNH_Hydra"

# initialize the test project
MitoPilot::new_test_project(
    path = wd,
    executor = ex,
    full_size = FALSE,
    Rproj = FALSE
)
If the test project was successfully initialized, you should see the following message.
Creating project directory: /pool/public/genomics/macguigand/MitoPilot/NMNH_workshop_2025-12-01/test_project_01
SRR22396758 - Upeneus parvus
SRR22396794 - Psychrolutes paradoxus
SRR22396940 - Psenes pellucidus
SRR22396740 - Hoplostethus occidentalis
SRR21844202 - Fundulus majalis
SRR22396640 - Xyrichtys novacula
SRR22396732 - Gephyroberyx darwinii
SRR22396627 - Gigantura indica
SRR21843972 - Stomias affinis
SRR22396843 - Conger oceanicus
SRR22396668 - Erotelis smaragdus
SRR22396865 - Paraconger caudilimbatus
SRR19434536 - Rhinecanthus rectangulus
Project initialized successfully.
Please open and review the .config file to ensure all required options are specified.
The new project directory contains a hidden file .config, which you can inspect if you wish. This file contains parameters that will be used by Nextflow to run the MitoPilot analysis workflow. All of the default settings in the config should work fine for the test project.
Launching the MitoPilot GUI
We can now launch the R Shiny graphical user interface (GUI) to examine our test project and start the MitoPilot analysis pipeline.
###########################################################################
# Launch the MitoPilot GUI
###########################################################################

# the function to launch the GUI
# must be called from within your project directory
# swap <<USER>> for your user ID
wd <- "/pool/public/genomics/<<USER>>/MitoPilot_workshop/test_project/run_01"
setwd(wd)
MitoPilot::MitoPilot()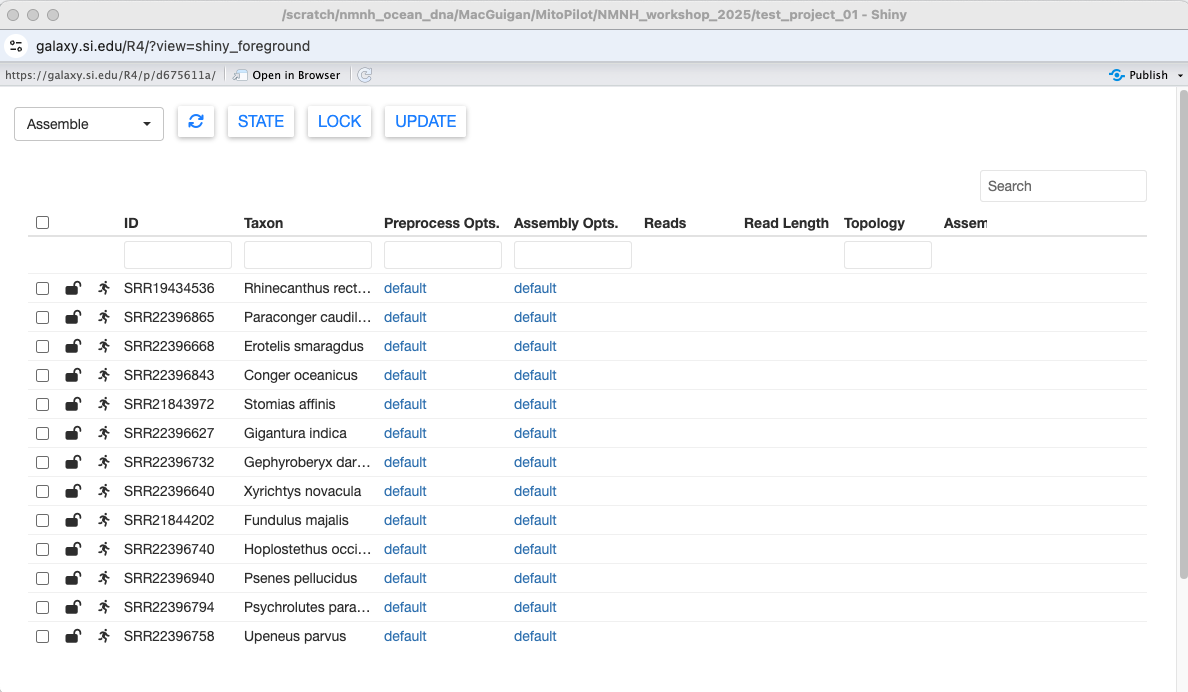
Nice! We can see some basic information about our samples. When initializing your own project, this info is pulled from the mapping CSV file.
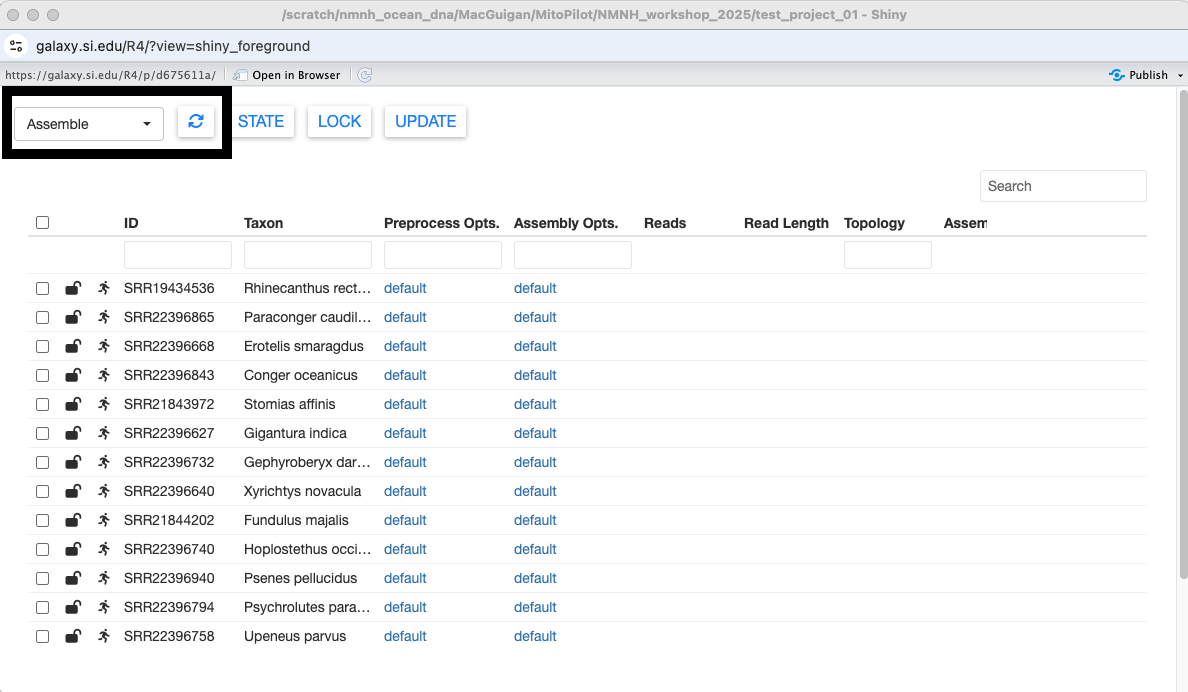
The dropdown menu at the top left switches between the different MitoPilot modules: Assemble, Annotate, and Export. If necessary, the circular arrow button in the top left will refresh the current table.
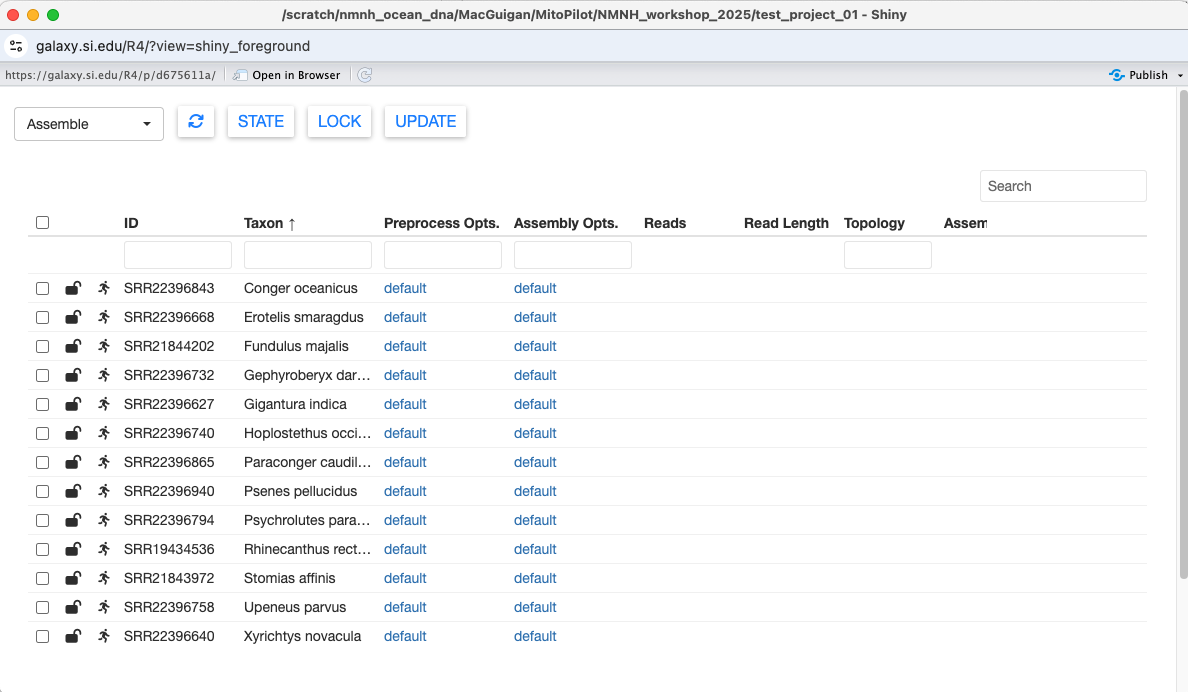
Clicking on a column name will sort the table by that column.
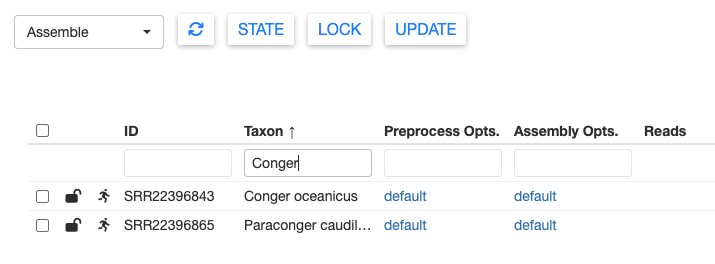
You can filter samples using the search box in the top right. Most columns can also be filtered using the text boxes at the top of the table.
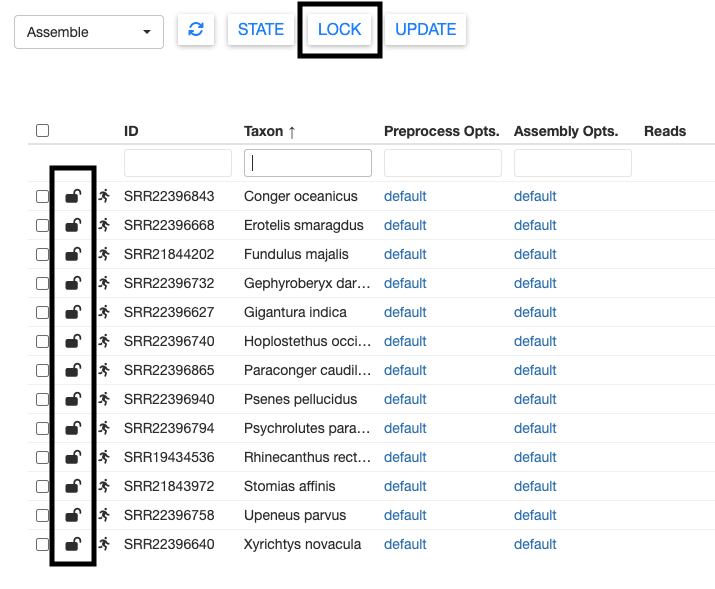
To the left of the sample ID column are two icons. The first icon shows whether the sample is locked or unlocked. If a sample is unlocked, it will be included when running the current pipeline module. A locked sample cannot be edited in the current module, but will be made available for the next pipeline module.
You can toggle the lock by selecting the sample, then pressing LOCK at the top of the window. Multiple samples can be locked or unlocked simultaneously.
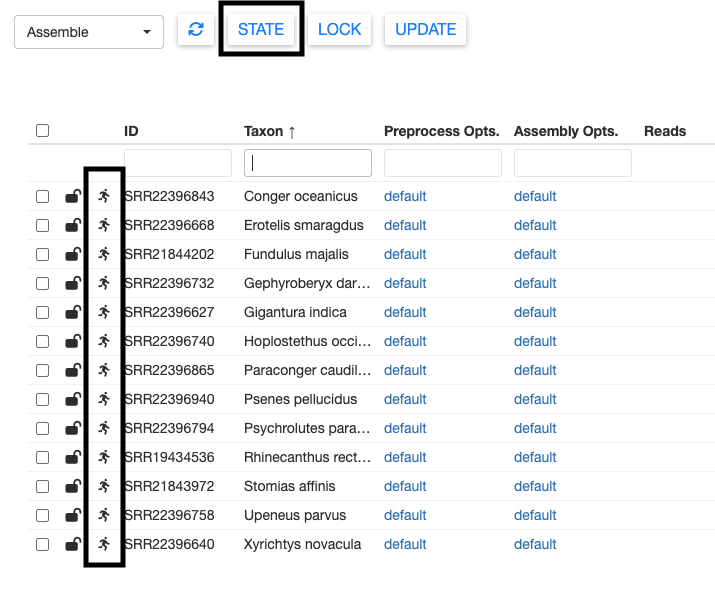
The other icon shows the state of the sample. These states vary depending on the analysis module and will be automatically updated when running the pipeline.
However, you can also manually change the state of a sample using the STATE button. For example, in the Assemble module you could prevent samples from running through the pipeline by manually setting their states to Hold / Waiting.
Modifying Pipeline Parameters
Within the GUI, we can modify options for each step of the current pipeline module. Click on one of the default links in the Preprocess Opts column.
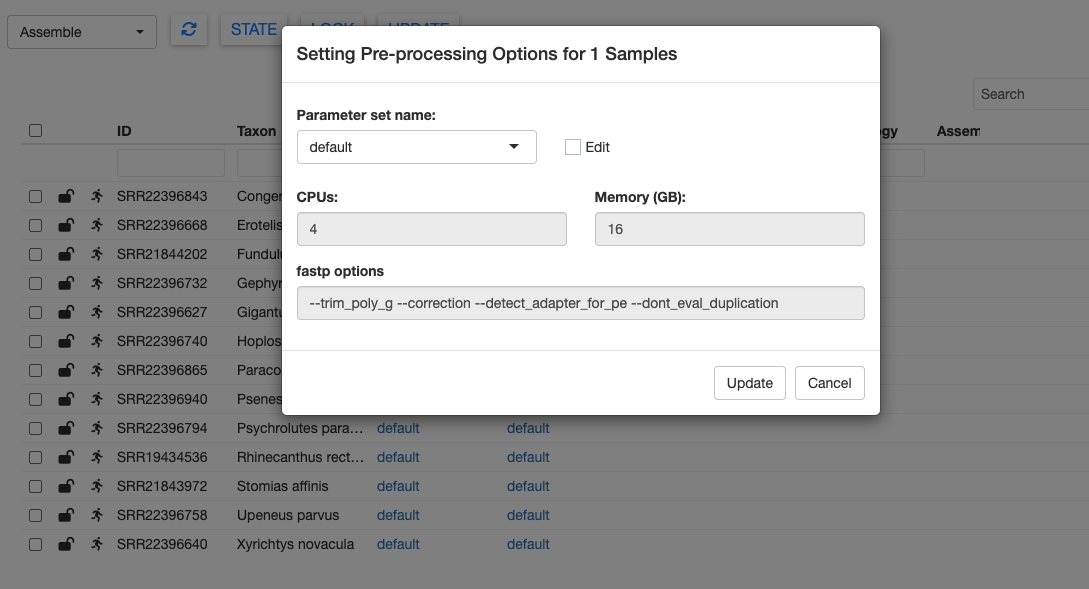
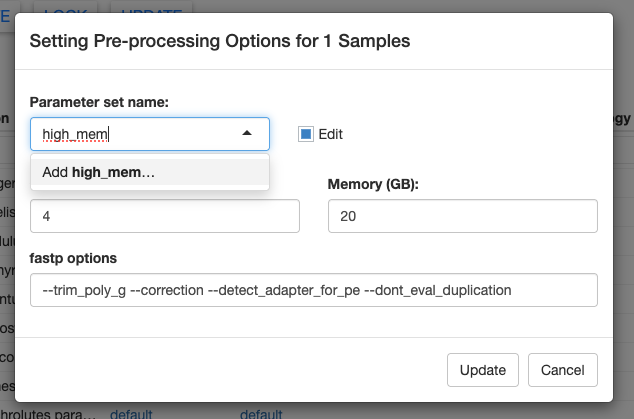
Here you can see the default options for pre-processing the raw FASTQ files. We can modify these by clicking the edit checkbox. Let’s change the memory to 20 GB. You could also change the options passed to fastp, but we’ll keep those at the defaults for now.
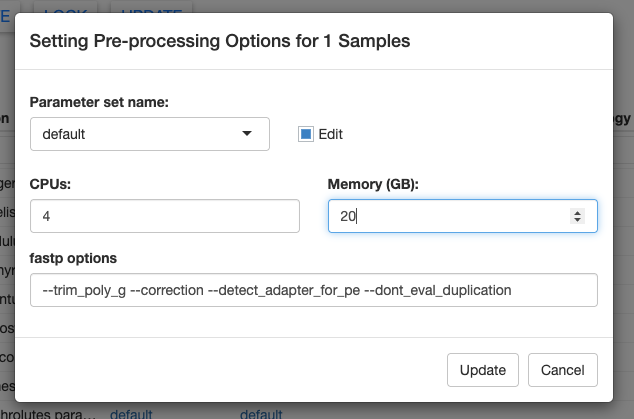
We can save these new parameter options by clicking on the Parameter set name box, typing a new name, and clicking Add YOUR NEW NAME... in the dropdown. Finally, click Update in the bottom right to save your changes.
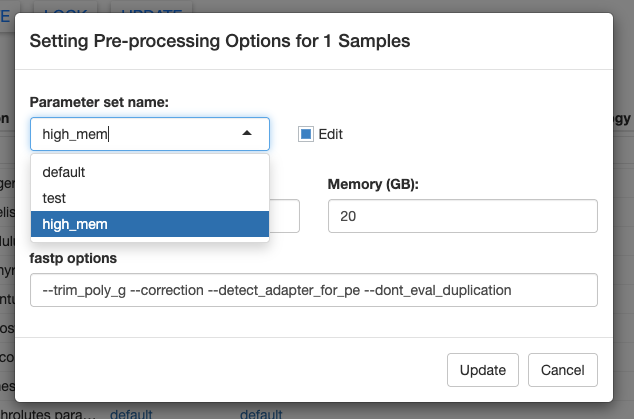
Once you’ve saved a new parameter set, you can easily access it again using the dropdown menu. In the screenshot below, you can see another parameter set called “test” that I created.
After clicking Update, your table should now show high_mem for all samples in the Preprocess Opts column.
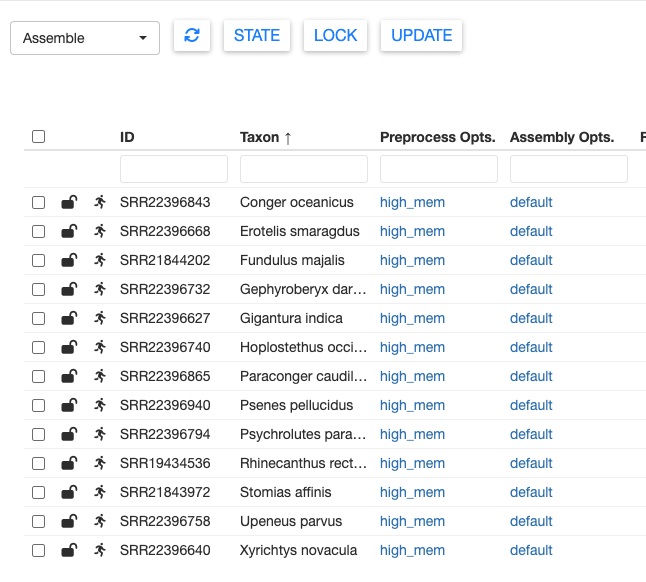
You can set different parameters for different samples by repeating the above process. But for the test dataset, let’s keep everything consistent.
Next, let’s modify the Assembly Opts. Repeat the process above, and creating a new high_mem setting with 6 CPUs and 60 GB of memory.
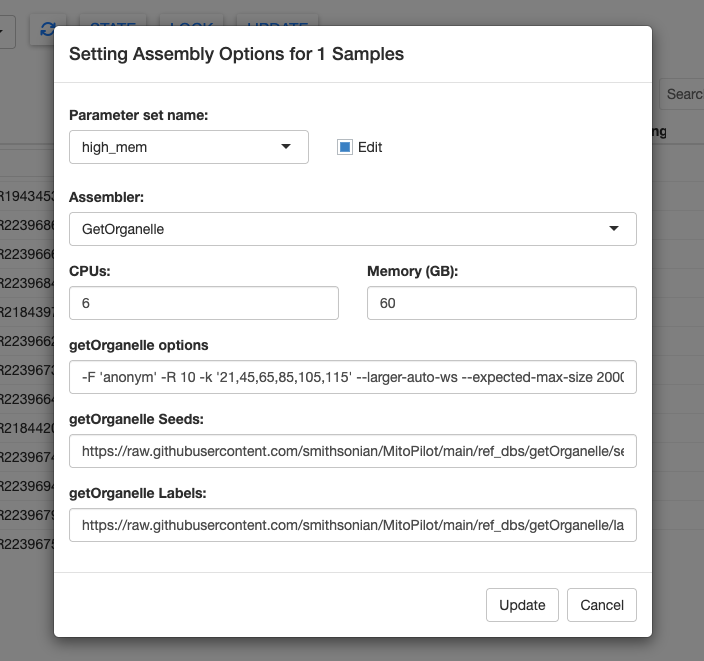
The Assembly Opts window has more options to tinker with. In the Assembler dropdown menu you can choose between GetOrganalle and MitoFinder.
GetOrganelle is the default assembler for MitoPilot. It is considerably faster than MitoFinder. The downside is that GetOrganelle requires good reference mitogenomes. Thankfully, there are many high-quality fish mitogenomes available. MitoFinder may be a better choice for clades with few reference sequences.
You can modify the parameters for GetOrganalle, including the seeds and labels databases. The default fish reference databases are downloaded from the MitoPilot GitHub repository. You could use custom databases by providing the full paths to the appropriate FASTA files on your local computer or cluster.
Likewise, you could provide a custom .gb reference database for MitoFinder. The default option is the Danio rerio reference mitogenome (GenBank NC_002333.2).
See our documentation for more info about custom GetOrganalle and MitoFinder databases,
For the test project, we’ll stick with GetOrganalle and the default settings.