Creating a Workshop Website
Creating a Repository from the Carpentries Template
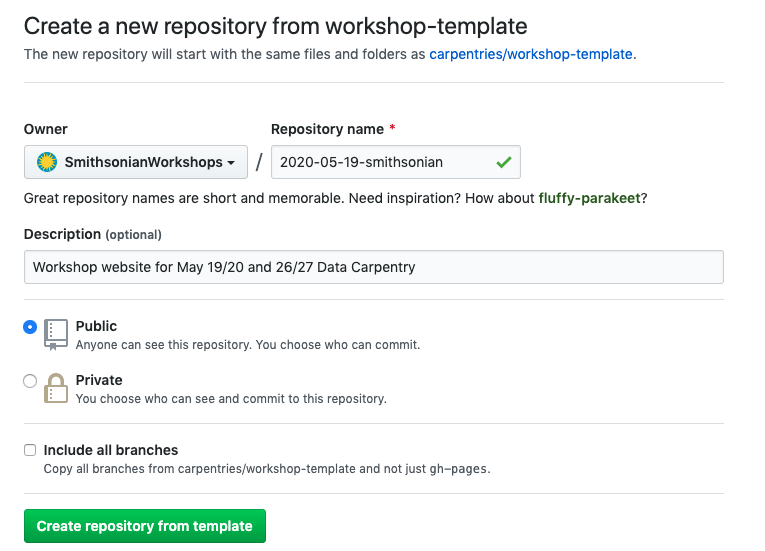
Log into GitHub, and go to https://github.com/carpentries/workshop-template#creating-a-repository. Follow the steps under “Creating a Repository” so that your screen looks like this (with different Name). Fill in “Workshop website for {dates} {workshop type}” for the Description. Contact Mike Trizna if you do not have access to the “SmithsonianWorkshops” organization.

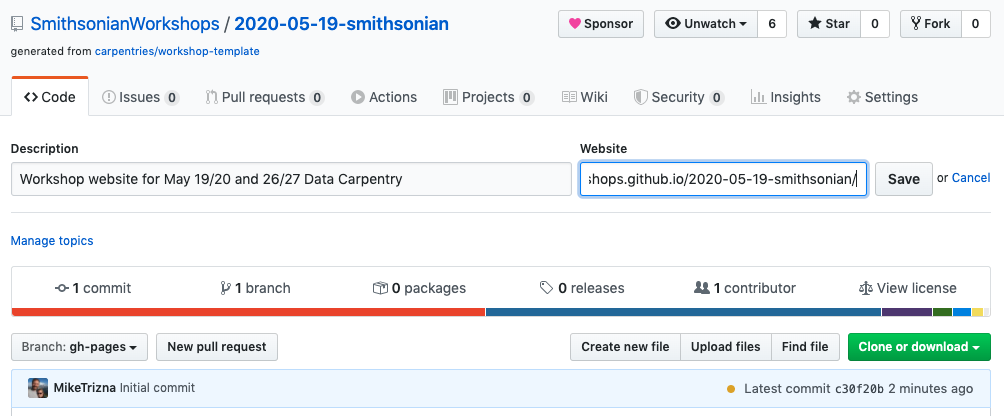
Test out the URL (of form https://smithsonianworkshops.github.io/[repo name]), and add it to the Repo description.

Updating workshop-specific info
Fill in workshop details in
_config.ymlandindex.mdModify workshop-specific resources in
_includes/intro.html:who.html:setup.html:syllabus.html:schedule.html:
Optional: Making an empty Main Branch
By default, when a user goes to the GitHub repository for the workshop, they will be confused by seeing confusing instructions about building a website. We can move all of these supporting files away from view, and have a fresh space to store workshop-related files such as Jupyter/R Notebooks, EtherPad exports, etc.
Using GitHub GUI
Using command line interface
If you have not already done so, clone the workshop repository to your computer and change directories into the workshop repo directory. (For illustration purposes, the fictional
2021-08-20-smithsonianrepository is used here. Replace this repo name with your workshop repo name.)git clone https://github.com/SmithsonianWorkshops/2021-08-20-smithsonian.git cd 2021-08-20-smithsonian
Check the existing branches. There should be only one branch,
gh-pages, where the course website files are located.git branch
Create and switch to a new local branch,
main. (The--orphanoption allows for cleaner history tracking for the new branch.)git checkout --orphan main
Remove all existing files on this new branch. (Double check that you’re in the workshop repo and on the
mainbranch before you run this command!)git branch git rm -rf .
If you check the directory, you will see that it is now empty. If you switch back to the
gh-pagesbranch, you should see all the course website files reappear.git checkout gh-pages
Switch back to
main. Then add aREADME.mdfile using nano or the text editor of your choice. Stage and commit this README file.git checkout main nano README.md git add README.md git commit -m "Create main branch and add README"
You can also add any additional files you would like to make available to students. (e.g. Jupyter Notebooks, R Notebooks, SQL files, etc.)
Push the new
mainbranch to the workshop GitHub repository. Sincemaincurrently exists only as a local branch, you will need to specify a new remote origin.git push -u origin main
Go to the workshop repository on GitHub. Go to Settings > Pages and confirm that the Source for the course website is currently listed as
gh-pages.Go to Settings > Branches. Under Default branch, click the icon to Switch to another branch. Choose
main, and click Update. You will see a warning message about unintended consequences of changing the default branch. Click the I understand, update the default branch button.Confirm that the workshop repository is defaulting to the new
mainbranch and that the course website is still showing up properly.